Deploy an ASP.NET Project on IIS 6
One of our ASP.NET project was built based on .NET 4 and focused on IIS 7.x web server, but doesn’t matter, IIS 6 support .NET 4.0 well, so we should be able to deploy the project on IIS 6 server too.
Our system is Windows Server 2003 and IIS 6.
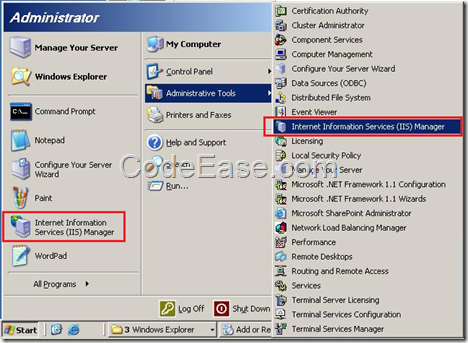
1: Load IIS Manager (Internet Information Services Manager)
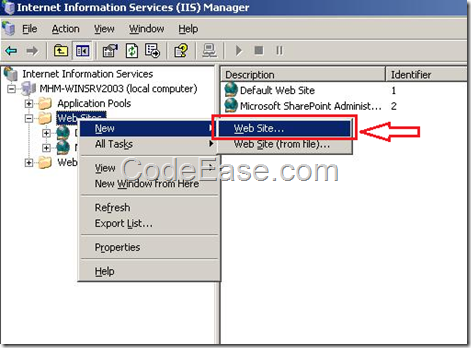
2: Right mouse click "WebSites" and select "Web Site …" to create a new website:
3: Now we see the Web Site Creation Wizard, just follow it and click Next button:

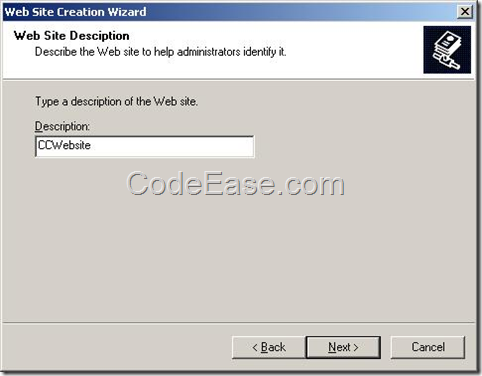
4: Give a website description (Please know this description is actually the "website name" which will be shown under the Websites node in IIS Manager, just like the "Default Web Site"), click Next button:
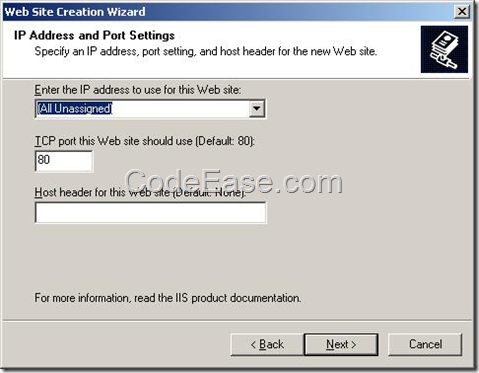
5: Set an IP Address for your website, or just keep default settings if you are installing your website for a temporary testing, just like us.
Note: If you set (All Unassigned) IP addresses, then it will set your current computer’s IP address as the website’s IP address.
About TCP port, the default HTTP port is 80, you can set another port number such as 81 for your new website, but in real environment, you should always use 80 for your website. And, please know all your web projects normally should use 80 port, so you should create different Virtual Directories for your different websites or web applications.
About "Host header", this is used for in case of you want to install multiple websites under a single URL or domain name such as www.yourdomain.com.
For our case, we keep all as default settings, and click Next button directly:
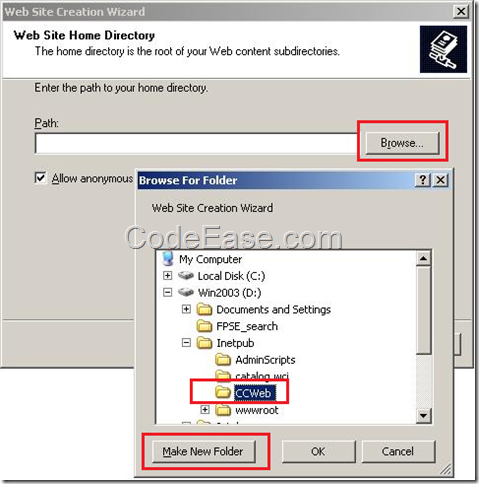
6: Now we enter a physical path on computer to be our new website home directory, we can directly click Browse button to choose one or create a new folder:
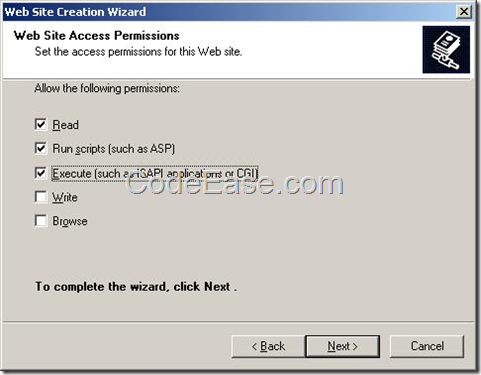
7: Now, choose Web site access permissions, normally, we should check on Read and Run scripts, if your web application includes some executable dll or CGI, you should check on Execute option also:
8: Now you can click Finish button to finish your steps:

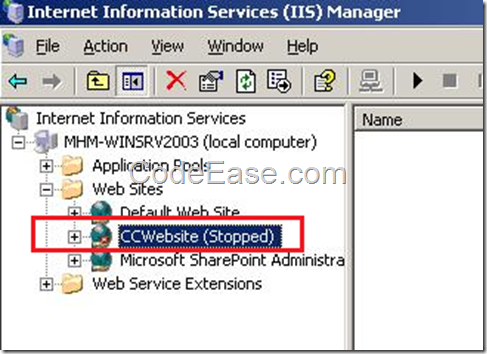
9: Now you can see your new website showing under the Web Sites node, but its status is Stopped:
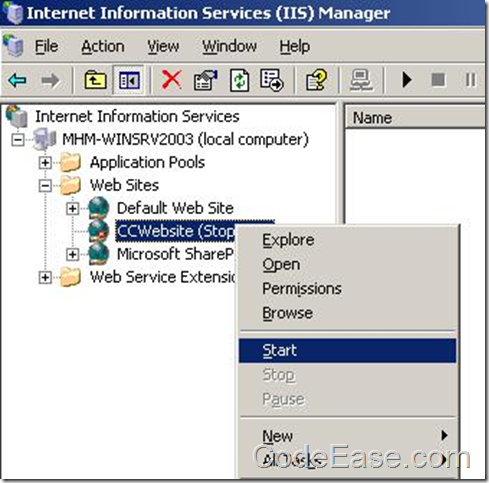
10: Now you can right click the new website and try to Start it:
11: You will see the following error message:
IIS was unable to start the site. Another site may already be using the port you configured for this site. Please select a unused port for this site.

Actually this error for sure occurred because we set the 80 port to this new website, but actually the port 80 has already set to the "Default Web Site" which we have mentioned above.
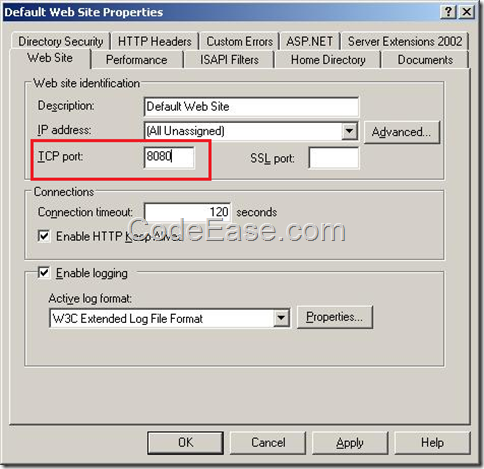
So we either can set a new port number like 8080 to our new website, or change the existing Default Web Site’ port number to another number so that we can use 80 port.
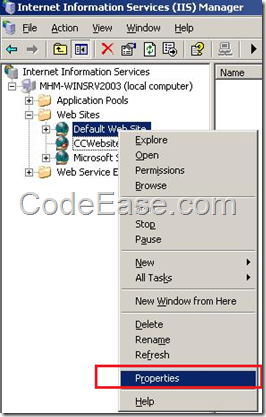
12: Change existing default web site’s port number:
We change existing "Default Web Site" port number from 80 to 8080: Right click "Default Web Site" and choose Properties:
13: Change the port number from 80 to another number:
14: Now you should be able to start your new website, try to repeat step 10, you will see your new website now started:
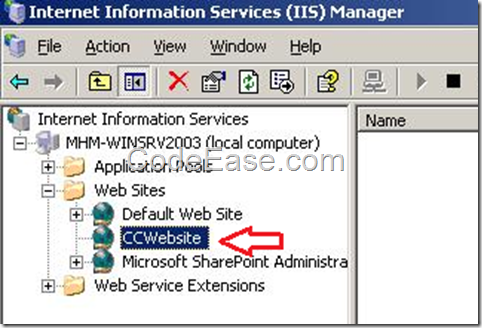
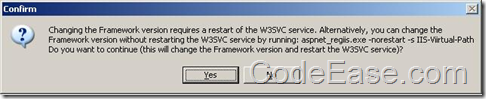
15: We should also make sure which ASP.NET version is set currently, right click new website and select properties, and open ASP.NET tab, change the ASP.NET version to newest one which you have installed on current computer:
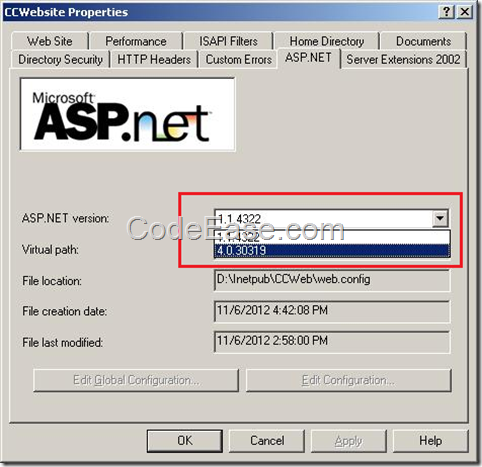
When you click OK, you will see the following message that tell you the web service should be restart, just click Yes button to restart the W3SVC service:
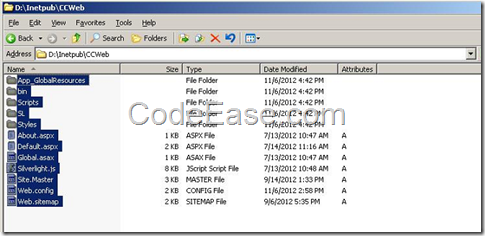
16: It is the time to copy your website content to the new website folder, copy your web application files and folders to the new website folder, which we created above in step 6, the folder name is CCWeb:
Actually before you copy your web application files, you should set right database connection string, and also corresponding Web URL if your web application used Web URL, such as WCF Service URL and Silverlight Service consume client application.
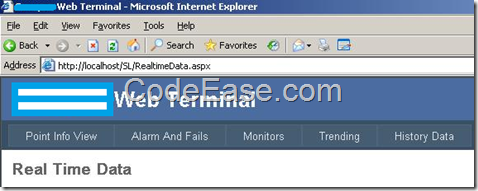
17: After you finished all above steps, now you just open your web browser, and input the address: http://localhost/, you should see your website now.
Done!
Good luck, friends!